3-Point Measuring Sleeves
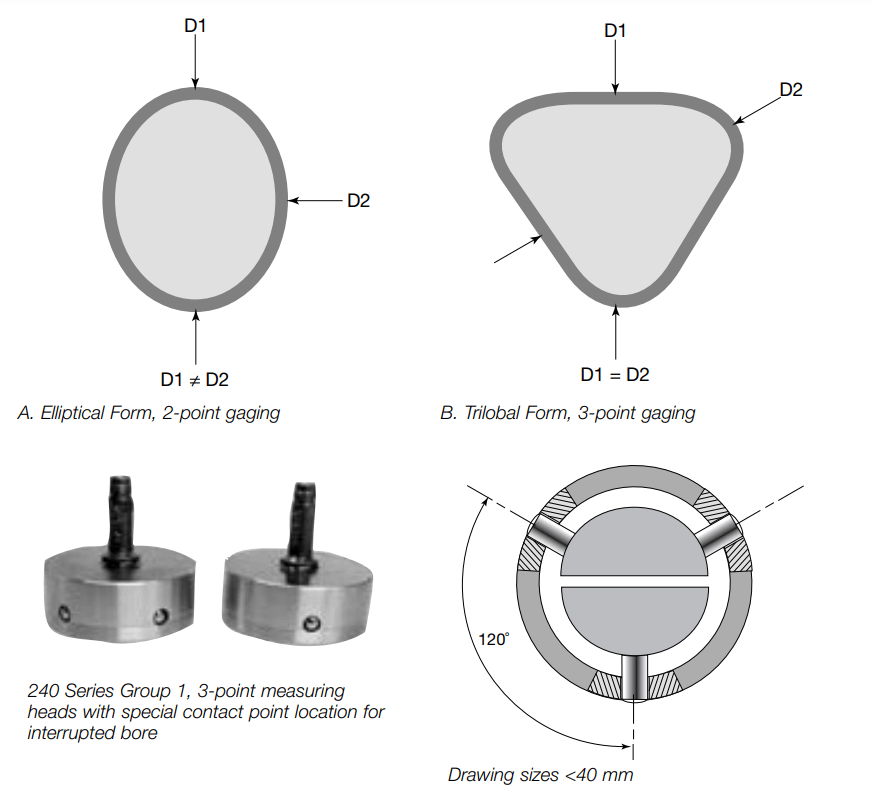
Three point contact bore gaging is designed to measure trilobing and polygonal shaped bores during the machining process. For example, centerless grinding process can produce three lobe parts. This can result in a nonfitting part assembly causing vibration, wear, and fatigue. Only 3-point contact gages are capable of measuring odd number lobes. See Figure B, Chart 1. Only 2-point contact gages will measure out-of-round conditions. See Figure A.
Note: When ordering 3-point contact sleeves just call Dyer and let us know your application.
3-point measuring sleeve ranges 0.390″–1.575″ (10–40 mm)
By way of a special grinding of the measuring needle the linearity/maximum deviation in accuracy is ≤1% of the measuring travel (max. travel is 0.008″ [0.2 mm]). This special floating contact design (see Dwg. 1) is used to measure smaller size bores. Also the three contact balls can be located at different radial locations if the bore wall is interrupted. Fax or e-mail Dyer your application.
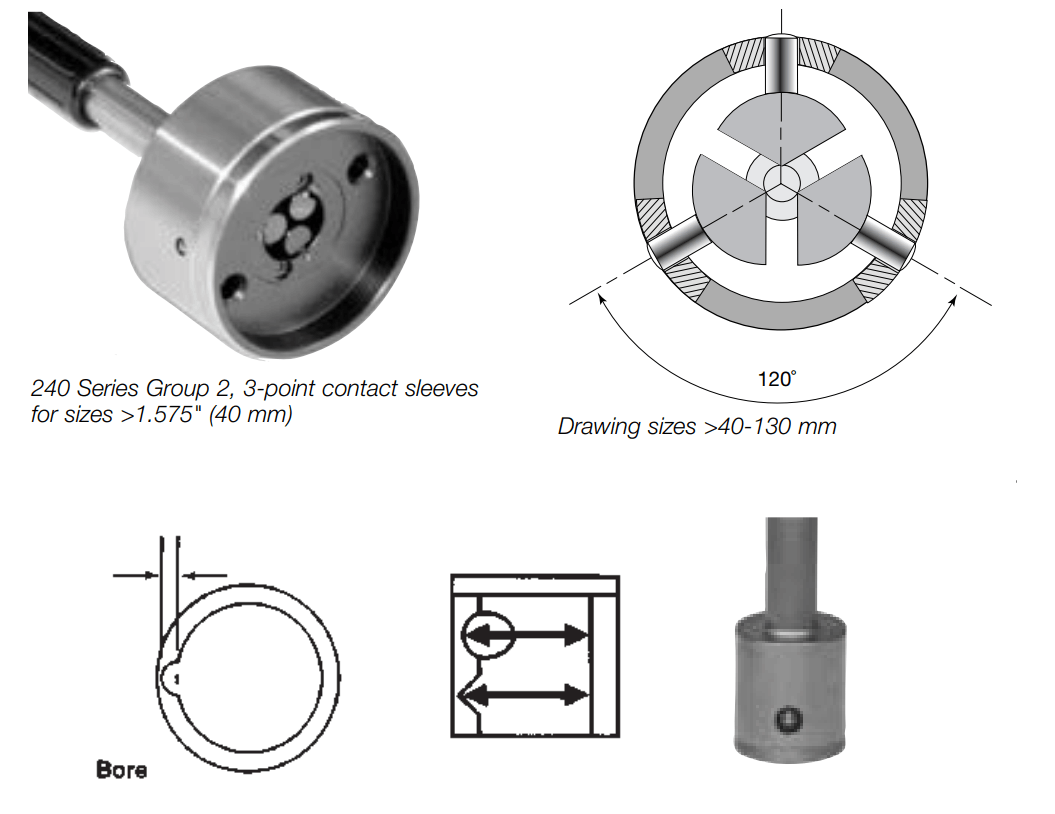
3-point measuring sleeves with true 120º 3-point contact measuring ranges 1.575″–5.18″ (40–130 mm)
This design has three independently moving contacts positioned at 120º. Sizes larger than 5.118″ (130 mm) available. Contact Dyer with your application.
1-Point Contact Measuring Sleeves
Measure the depth of a groove in a bore or parallel surface. These measuring heads are made with only one moveable contact point. The contact point can be retracted. Contact Dyer with your application.

