Maximum Measuring Accuracy
Linear ± 0.0001″ (0.0025 mm)
Repeatability ≤ 0.0001″ (0.0025 mm)
Gage R & R capability ≤10% when
measuring high tolerance bores. Contact
Dyer with your application.
Direct “in-line” electronics, better large bore gaging
When gaging large bores there are many problems to overcome. Up to now, the “bar type” gage designs (i.e. shallow hole, swing gages) or I.D. mics have been used to measure large bores. Unfortunately, these designs do not meet the accuracy, repeatability and Gage R & R requirements of today’s manufacturing processes.
Dyer’s 136 Series will meet and exceed your large bore measuring requirements and at a reasonable cost. Also, we guarantee a ≤10% Gage R & R on high tolerance bores.
Let’s see why the 136 Series is the best choice to measure large bores:
When gaging large bores, we have to consider the following issues:
1. Easy to use and lightweight.
2. No operator influence when mastering or measuring. Automatic aligning in the bore.
3. Precise linear accuracy and repeatability.
4. 10% Gage R & R capability at high tolerances.
5. One gage for rough cut and final cut measurements. Long contact point travel.
6. Large measuring range using one gage and the ability to change size ranges easily.
7. Electronic reading.
8.Retracting contacts for recess and groove measurements.
The 136 Series gage will measure large bores “directly in-line”, on the measuring axis. These gages are designed for large bore diameters with short measuring depths.
Notable Features
Easy to use and lightweight
“You place the gage in the bore, take your hands off and view the measurement.”
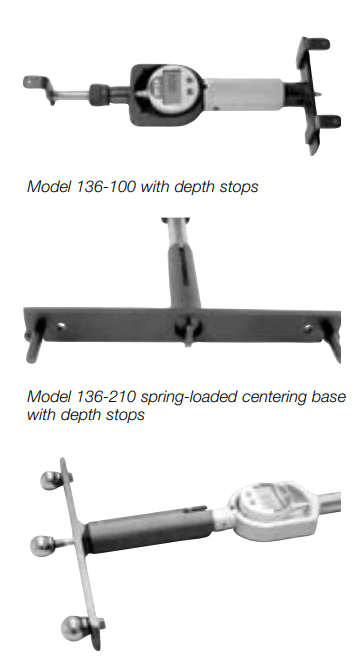
Spring loaded self-centering base
“Automatically aligns the gage in the bore. Hands off gaging assures accuracy and repeatability when mastering and measuring.”
Precise linear accuracy ± 0.0001″ (0.0025 mm) and repeatability < 0.0001″ (0.0025 mm)
Gage and indicator are directly “in line” on the measuring axis, eliminating hysteresis and mechanical transfer errors.” 50% higher accuracy is possible. Contact Dyer.
Long contact point travel 0.475″ (12 mm)
“Accurate linear measurements are a result of the in-line indicator design.” Optional contact point retracting pin for groove and recess applications. Contact Dyer.
Dyer guarantees a 10% Gage R & R
capability on high tolerance bores.
Large size range capability
Model 136-100 has a 9″ range (11.00 – 20.00″) and Model 136-200 has a 15.75″ range (15.75-31.50″). Larger sizes available. Contact Dyer.
Length changeable Depth stops locate on the bore’s face or step.
Gage drops into the “in-line axis” measuring position. There are no “hanging contact feet”.
Many indicator possibilities for SPC data collection

Model 136-210 custom design for diameters larger than 31.00″ Special contacts and centering-base designed for measuring the I.D. of large bearing races.

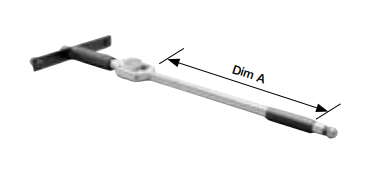
Model 136-210 fixed tube “Dim A” can be many lengths and interchangable for different diameters sizes.
Models and Specifications
| Range
Inch (mm) |
Contact Point Travel | “h” Dim. | Fixed
Contacts/ Washers |
Range Extensions | Depth Stop | Order No. Inch | Order No. E/Inch/Metric |
| 11.00–20.00″
(280–510 mm) |
0.475″ | 0.630″ (16 mm) | 7/4 | 3 | 3 | 136-100 | 136-110 |
| 15.75–31.50″
(400–800 mm) |
0.475″ | 0.690″
(17.5 mm) |
11/4 | 3 | 3 | 136-200 | 136-210 |
1 Larger sizes possible, contact Dyer.