Maximum Measuring Accuracy
Linear ≤ ±0.000040″ (±0.001 mm)
Repeatability ≤0.000020″ (<0.0005 mm)
Gage R & R ≤10% capability measuring high tolerance bores.
630 Series measuring heads reach up to 50 feet depths
Notable Features
High accuracy, repeatability, long contact travel at up to 50’ depths. Easy to use, no operator error, floating contact design moves easily in and out of bore.
Fast accurate measurements, measuring head aligns automatically throughout the bore, and no operator error.
Large measuring ranges. Cost justifiable system.
Systems electronic indication has several options. Gage can be batteryoperated and completely portable. Contact Dyer with your application requirements.
Measuring head configuration allows multiple depth extensions to be used without influencing the measurement.
Build up your own 630 system by selecting your components or contact Dyer application engineering and we’ll create one for you.
1. Measuring heads – each head includes a 39″ extension.
2. Extension holders
3. Electronics
4. Adjustable set master
Measuring Applications
Measure barrel wear injection molding machines.
Measure barrel wear food processing machines.
Large and/or bearing surfaces. Irregular size deep holes.
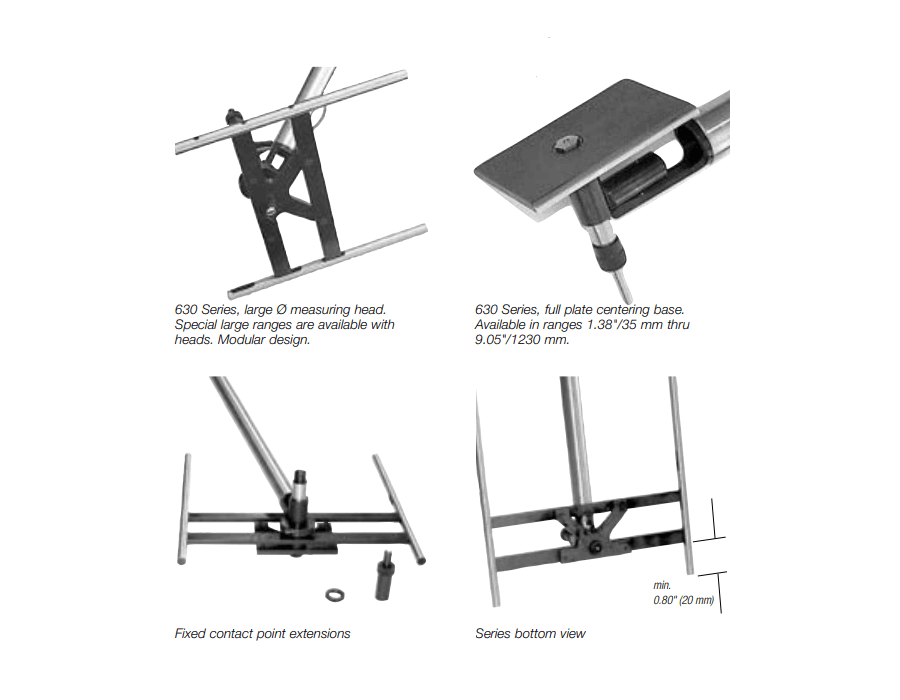
Longer contact travel possible. Position of floating contact points on self centering base can change for blind hole applications. Contact Dyer.

Specials
Measure precision bores up to 50′ depths with portable electronic amplifier and digital pencil probe
Specials
Measure precision bores up to 50′ depths with field portable electronic indicator and special probe/cable
| Measuring Range | Contact Travel | Order Number A & B | Part Number | Length | |||
| Inch | mm | Inch | mm | Tool Steel | 630-070 | 30″ | |
| 1.38-2.36 | 35-60 | 0.050 | 1.27 | 630-001 | 630-080 | 40″ | |
| 1.97-4.72 | 50-120 | 0.055 | 1.4 | 630-002 | 630-090 | 60″ | |
| 3.94-9.05 | 100-230 | 0.063 | 1.6 | 630-003 | 630-100 | 80″ | |
| 7.87-19.69 | 200-500 | 0.100 | 2.5 | 630-104 | 630-110 | 100″ | |
1 Longer contact travel available, contact Dyer